A single blurry photo of a racket on a carpet will sit unsold for weeks. The same frame, photographed in five minutes with a phone, can move in a day. I have watched this happen enough times in the shop to say it with confidence.
If you are listing a racket on EpicRackets, the photographs are doing the sales work before a buyer ever reads your description. Players shopping pre-owned gear are cautious by nature. They cannot pick the frame up, flex it, or check the grip with their own hands. Your photos are the substitute for all of that. Get them right and you remove the friction that stops someone pressing "buy". Get them wrong and you are competing on price alone, which is a race you do not want to run.
The seven shots that actually sell a racket#
You do not need a studio or a ring light. You need a clean background (a white wall, a wooden floor, a plain table), decent natural light, and a steady hand. Here is what to capture.
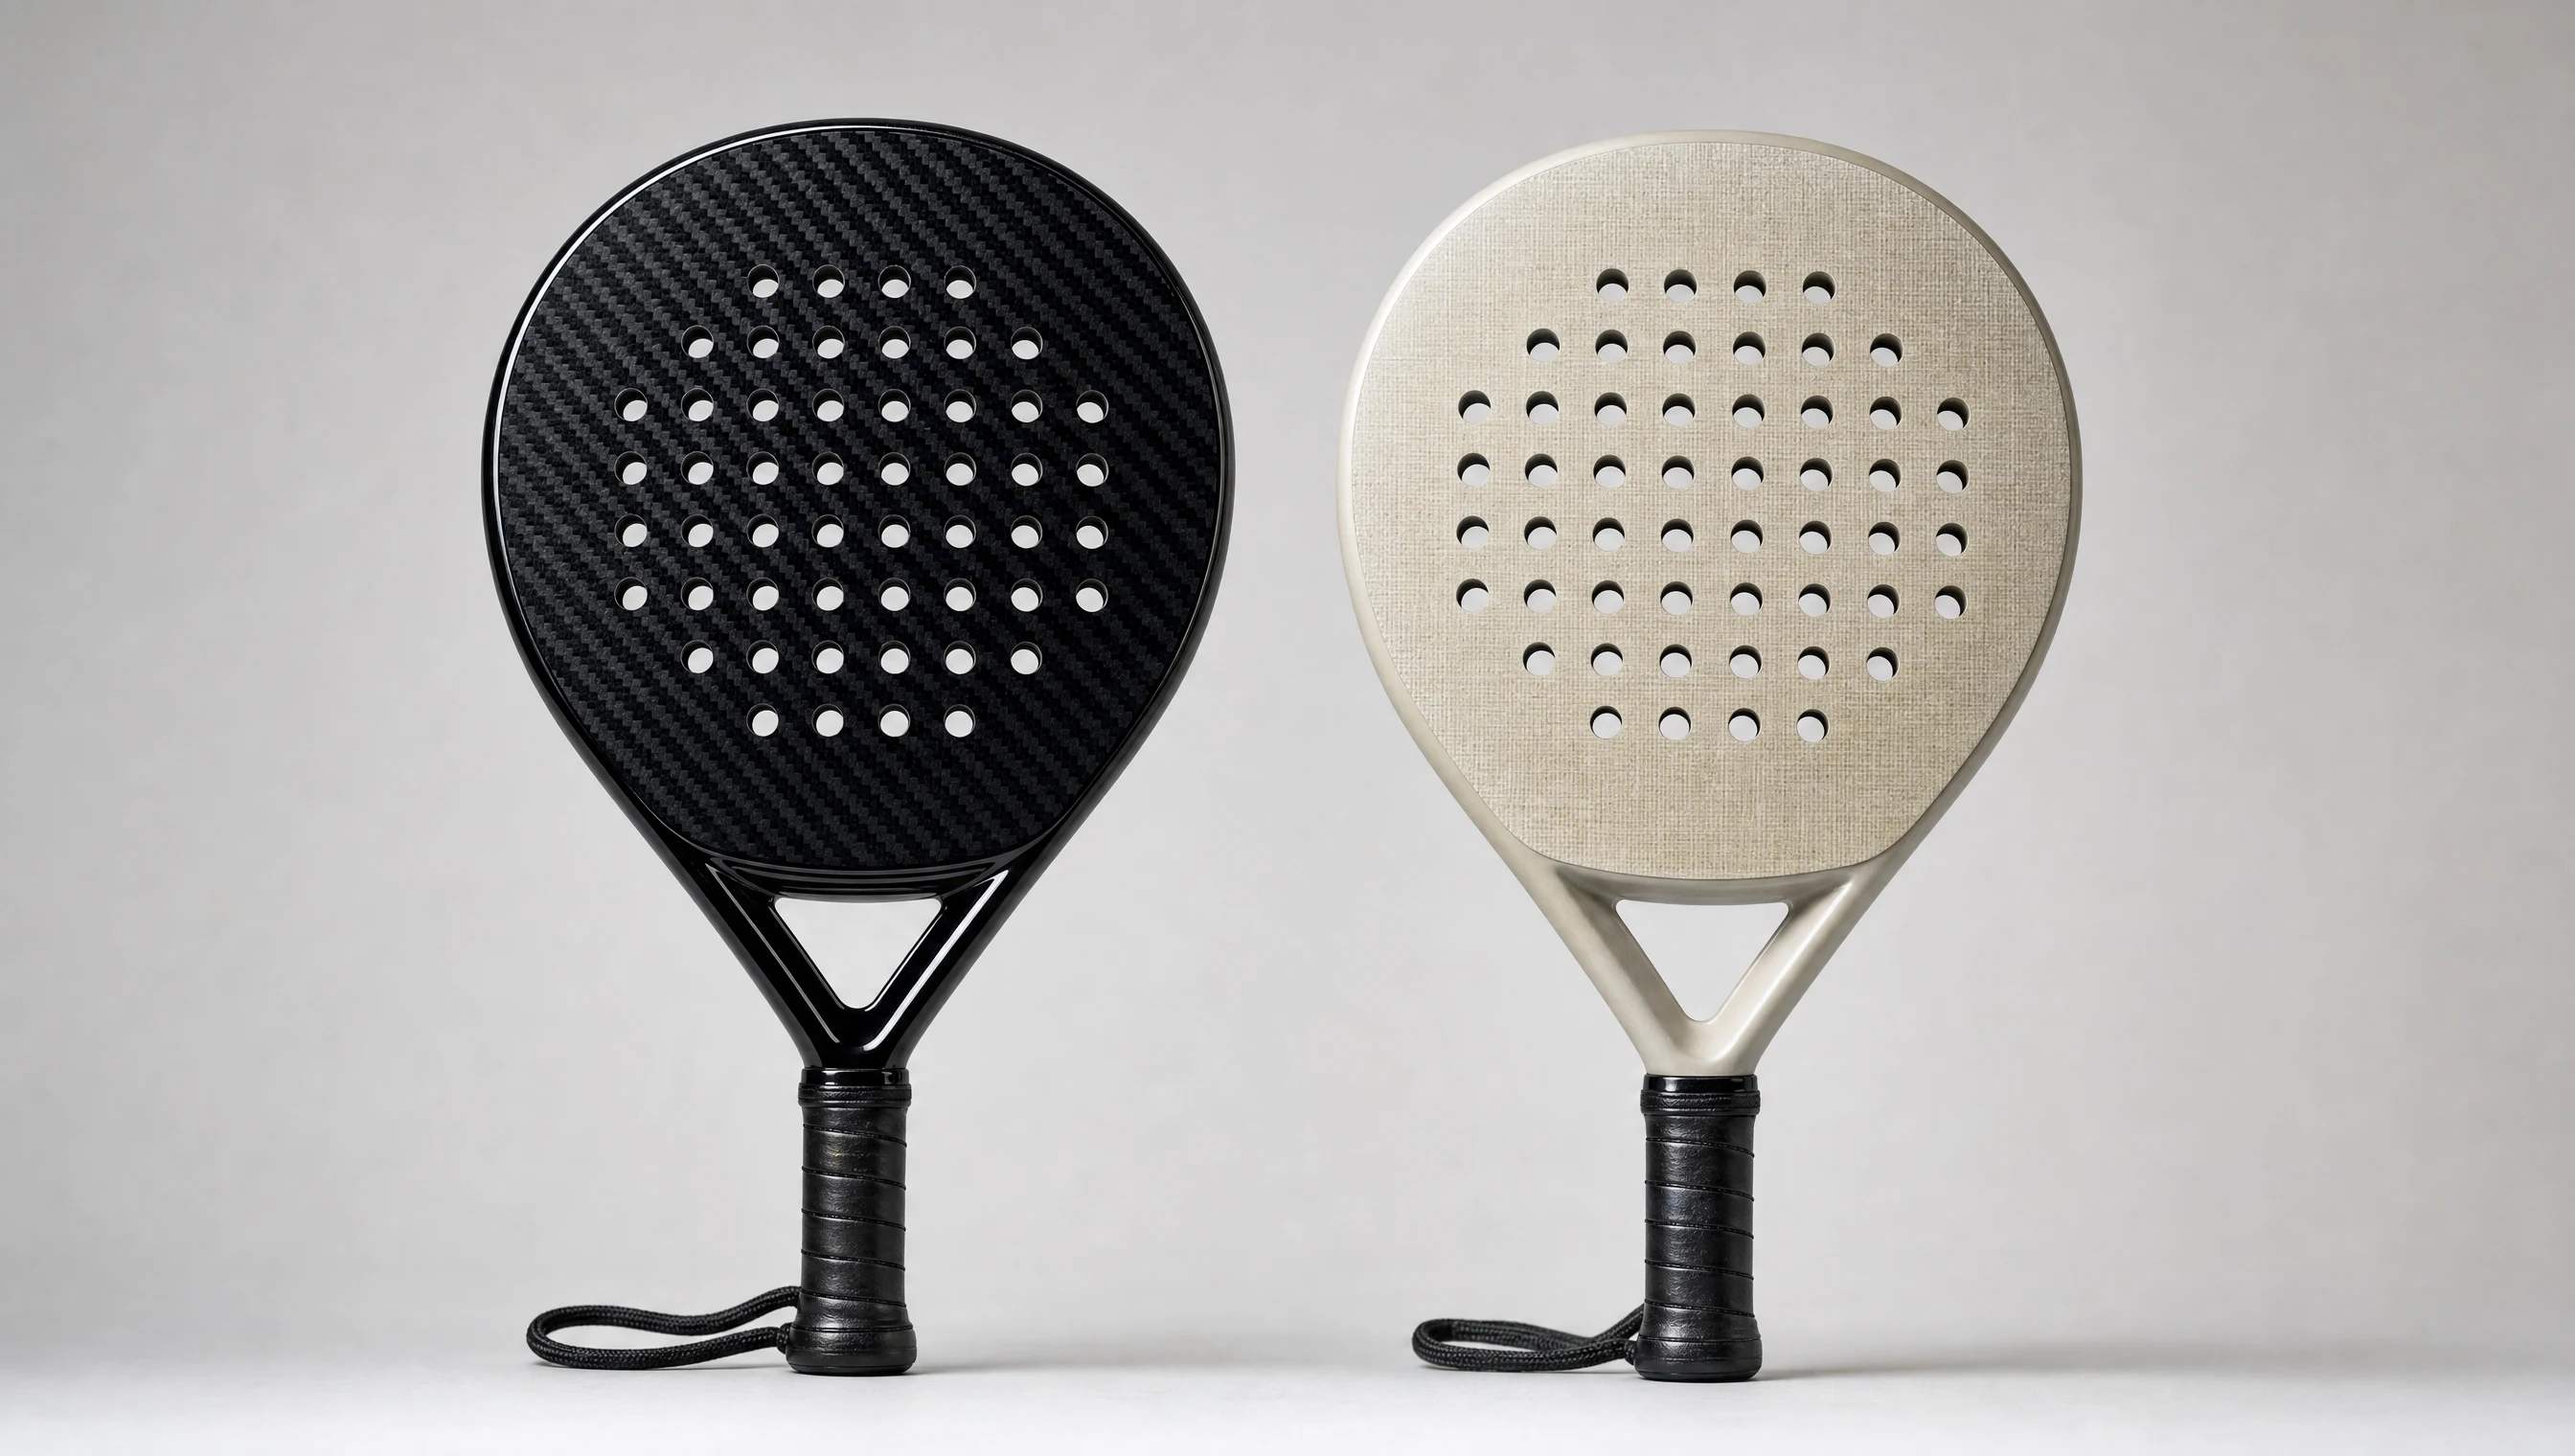
Full face, string side up. Lay the racket flat or hold it face-on to the camera. Fill the frame. This is the shot buyers see first in search results, so it needs to be sharp and well-lit. For a padel racket, this shows the hitting surface and the perforation pattern clearly. For a tennis racket, it shows the string pattern, the frame profile, and any cosmetic marks on the face.
Full face, back side up. Flip it over. The back of the frame is where paint chips, scratches, and court scuffs tend to live. Buyers know this and they will assume you are hiding something if you only show one side. Show both sides every time.
Grip end. Point the camera straight down the handle toward the butt cap. This shot reveals grip size, grip condition, whether the overgrip is fresh or worn through, and whether the butt cap is cracked. It takes ten seconds and answers three questions buyers would otherwise have to ask.
Close-up of any wear. This is the shot most sellers skip, and skipping it is a mistake. If there is a scuff on the throat, a chip on the frame edge, or a worn patch on the hitting surface of a padel racket, photograph it directly. Fill the frame with it. A clearly photographed flaw is not a deal-breaker. A flaw discovered after purchase is a dispute. Honest wear shots build the trust that closes sales.
String condition (tennis only). A mid-close shot of the strings at an angle shows whether they are notched, fraying, or still tight. If you know the string and tension, say so in the description. If the racket needs a restring, say that too. Buyers who want to play immediately will factor in the cost. Buyers who restring everything themselves will not care at all.
Weight on a scale. Unstrung weight for tennis rackets, total weight for padel frames. Hold the racket on a kitchen scale and photograph the reading. This one image removes the single most common pre-purchase question. Players are particular about weight, and a verified number beats a manufacturer spec that may have drifted in production.
Full frame at an angle, in natural light. A 45-degree shot with the racket slightly elevated shows the three-dimensional profile of the frame, the thickness of the beam, and the overall condition in a way that flat lay shots cannot. Take this one near a window in daylight.
What kills a sale before the buyer reads a word#
| Problem | Why it kills the sale |
|---|---|
| One photo only | Looks like you are hiding something. Most buyers will not ask, they will just scroll on. |
| Blurry or dark images | Players cannot assess condition. Doubt defaults to no. |
| Stock images from the brand website | Tells buyers nothing about the actual frame they are buying. Looks like a scam listing. |
| Carpet or cluttered background | Distracting and unprofessional. The frame gets lost. |
| Damage visible but not acknowledged | If a buyer spots it before you mention it, trust evaporates immediately. |
| No weight shown | Generates questions, delays the sale, occasionally loses it. |
| Portrait-only shots with the frame tiny in frame | The buyer needs to see the frame, not your kitchen ceiling. |
Every one of these mistakes signals the same thing to a buyer: the seller either does not know what they are doing or is not being straight with them. Neither reading moves the sale forward.
Honesty is a pricing strategy, not just ethics#
I have seen sellers try to photograph around a scuff, angling the light to hide a chip, cropping out a worn grip. It never works as well as they think, and when the buyer receives the frame and notices the damage, the result is a return request or a negative review. Both cost more than the few euros the seller was trying to protect.
The better approach: photograph the damage clearly, describe it accurately, and price accordingly. A racket with an honest listing at the right price sells faster than a misleading listing at the same price, because the buyer does not have to do the mental work of wondering what you are not showing them. Transparency is a competitive advantage in a pre-owned marketplace.
If you are unsure how to price a frame with visible wear, have a read of our guide to selling pre-owned rackets. It covers condition grading, pricing by age and use, and how to write a description that does not undersell a frame that still has plenty of play left in it.
Before you list: a quick checklist#
Before you upload anything, run through this:
- Clean the frame with a damp cloth. Dirt photographs badly and implies neglect.
- Find a plain background. A white wall or a wooden floor takes thirty seconds to set up.
- Shoot in natural daylight, not overhead artificial light.
- Take all seven shots listed above.
- Photograph every flaw directly. Do not crop it out.
- Weigh the frame and include the reading in at least one image.
- Check that every photo is in focus before uploading. Delete any that are not.
That is genuinely all it takes. The whole process should run to about ten minutes once you have done it once.
Get it listed#
If you are ready to list, head to /sell and you will find the upload flow straightforward. You can add up to eight images per listing, which is more than enough to cover everything above with room for a detail shot or two.
If you are on the buying side and want to understand what good condition grading looks like from a buyer's perspective, the how to spot a fake tennis racket post is worth a read. A lot of the visual inspection principles overlap with assessing genuine pre-owned gear.
Good photos do not just sell your racket faster. They mean the buyer gets exactly what they expected, the transaction is clean, and the frame goes to someone who will actually play with it. That is the whole point of a marketplace like this one.